Messing around waiting for my takeaway to arrive...
Friday, 30 January 2015
Flash animation with Meg
Had lots of fun in our animation lesson with Meg today. We created animations using simple lines.
Wednesday, 28 January 2015
Life Drawing 28/01/15
Sharon was our model again today for life drawing and Vicki asked us to concentrate on using colour, after a few warm up sketches.

Quick 10 min sketches in charcoal

20 min charcoal, chalk and pastel

20 mins in pastel

25 mins in gouache
Tuesday, 27 January 2015
Maya Tutorials - Camera Shake
I loved doing these camera shot tutorials. I learnt a lot, not only about how the cameras work in Maya, but also about camera work in general. Lots of fun.
Camera shake - Pass by
Camera shake - Drop
Maya Tutorials - Pitch and Dolly Shots
Had trouble playblasting a couple of these tutorials in the lessons in Quicktime with Simon, so I've redone them and playblasted the way we are shown in the tutorial using MS-CRAM.
Pitch Shot
Dolly Rig Shot
Monday, 26 January 2015
Sunday, 25 January 2015
From Script to Screen - character sketches (& Antonio Carluccio!)
Some quick sketches of how I envisage the main characters in my story. We have the friendly looking, down trodden clown and the arrogant, prim and proper pastry chef. These are just initial thoughts, so lots more research and sketching to do.

Hand drawn sketches

Sketches in our Sketchbook Pro lesson with Simon. I loved using Sketchbook and found it much more effective when sketching than using Photoshop. Really enjoying playing around with it.
I also didn't realise until now how much Antonio Carluccio looks like a friendly clown, bless him! Ha ha! Might have to play around with this pic in Photoshop!

Wednesday, 21 January 2015
Life drawing 15/01/15
My 100th blog post!! Life drawing this week was with model Brian. We had longer poses this time.

Turnarounds - 10 mins each in graphite

20 min pose with graphite and charcoal

30 min pose in graphite and charcoal. I was tempted to finish at the point above, but Vicki said to carry on working into the drawing after I'd taken a pic of it at this point. Below is the drawing after the complete 30 mins.

Monday, 19 January 2015
Maya tutorials - Distance Shots
Close tracking shot
Mid tracking shot
I have a video of the far tracking shot but cannot upload to Blogger. Will cut down the size to less than 100MB and repost!
Maya Tutorial - Creating a camera rig
Interesting tutorial showing how a custom camera rig is set up in Maya.


Pan, Pitch & Roll set up
Thirds, Focal Length & Overscan set up
Friday, 16 January 2015
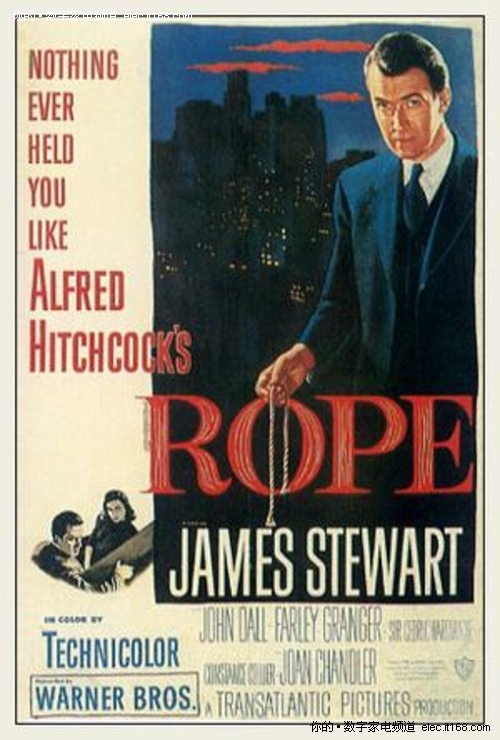
Film Review - Rope (1948)

Fig.1. Rope, (Movie Poster, 1948)
Set in a New York apartment, Alfred Hitchcock's Rope is one of many treats from the master of suspense. The film is derived from a 1929 play of the same name by Patrick Hamilton, which in turn was based on the real-life Leopold and Loeb case. The story revolves around a couple of university friends, Brandon and Phillip, and their desire to prove their intellectual superiority by murdering fellow ex-classmate David Kentley. They carry out their attack by strangling him to death with a length of rope and then putting him in an antique chest until the evening when they can dispose of the body (Fig.2). They then plan a dinner party, inviting all of their victim's friends and family, including his fiancée Janet. In a bid to divert any suspicion and prevent the discovery of the body in the chest, Brandon decides to serve the guests' food from the top of the chest, much to the surprise of their housekeeper, Mrs Wilson who has already set the table in the dining room (Fig.3).

Fig.2. Hiding the body in the antique chest (Film still, 1948)
The point of Hitchcock showing the murder at the very beginning works well to build up the suspense throughout the film. One of the most tense parts of the movie comes when the housekeeper is clearing away the dinner plates and prepares to put some books away in the chest. Although the main characters are conversing in the background, the camera stays focused on the chest and the housekeeper, building the suspense for the audience. R Nathaniel says of Hitchcock's skill in his review for The Film Experience "The amount of tension Hitchcock manages to build by doing so little is admirable." (Nathaniel, 2011).

Fig.3. Setting the dinner on the chest, (Film still, 1948)
Suspicions begin to grow when the guests move to the dining area to look through some books that Brandon and Phillip have prepared for David's father, Mr Kentley to take home. One of the guests in particular, ex-teacher Rupert Kadell, begins to piece together some abnormalities. He questions Phillip who has been acting increasingly nervous all evening. The suspense is built again when Phillip is playing the piano along to a metronome during his conversation with Rupert. His playing becomes erratic and he starts to play off-key as he becomes more and more under pressure (Fig.4). These subtleties are what make the movie so effective and addictive to watch.

Fig.4. Rupert Kadell questions Phillip, (Film still, 1948)
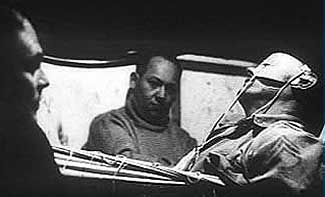
Probably the most notable point of the making of Rope is how Hitchcock planned to shoot the film in one continuous take, pausing only when the film reel needed to be changed. To ensure this ran smoothly, he would zoom into the back of a character's jacket, rather than just cut away. The entire film has the feeling of being played in a theatre set. In her review for The Guardian, Pamela Hutchinson says "Rope feels "live", which means that at any minute one of the actors could do something unexpected, such as fluff their lines, or heaven forbid, open the trunk." (Hutchinson, 2012). Shooting in this way gives the audience more of a feeling of being involved in the story and that they are there in person, rather than viewing over a series of days or weeks, as is the norm for most other films, giving the sense of being detached from the action (Fig.5).

Fig.5 Soundstage filming, (Still, 1948)
Vincent Canby, when reviewing Rope back in 1984 for The New York Times, describes the camera as being like a cat and stalking around the set: "That "Rope" does become emotionally involving has nothing to do with character identification and everything to do with watching a camera master at work, as he denies himself the usual tools of his trade to find out just how effective the camera can be, working more or less on its own. It swoops and pries about the set, moving from close-ups to long shots and medium shots, with a kind of studied indifference." (Canby, 1984). That the filming was completed in this way adds to the character of the film and although jerky in places, it still works successfully over sixty years later. The comedy and anticipation of what will happen next are what makes this film one of the greats.
Illustration List:
Figure 1 - Rope (1948) [Movie Poster] At:
(Accessed 14.01.15)
Figure 2 - Hiding the body in the antique chest (1948) [Movie Still] At:
(Accessed 14.01.15)
Figure 3 - Setting the dinner on the chest (1948) [Movie Still] At:
(Accessed 14.01.15)
Figure 4 - Rupert Kadell questions Phillip (1948) [Movie Still] At:
Figure 4 - Soundstage filming (1948( [Still] At:
http://thefilmexperience.net/blog/2011/6/22/personal-canon-100-rope.html
(Accessed 14.01.15)
http://thefilmexperience.net/blog/2011/6/22/personal-canon-100-rope.html
(Accessed 14.01.15)
Bibliography:
Canby, V (3rd June 1984), The New York Times review, At:
Hutchinson, P (27th July 2012), The Guardian review, At:
http://www.theguardian.com/film/filmblog/2012/jul/27/my-favourite-hitchcock-rope
Nathaniel, R (22nd June 2011), The Film Experience, At:
http://thefilmexperience.net/blog/2011/6/22/personal-canon-100-rope.html
Nathaniel, R (22nd June 2011), The Film Experience, At:
http://thefilmexperience.net/blog/2011/6/22/personal-canon-100-rope.html
Blob animation continued...
I love Meg's lessons so much!! Today we carried on with the blob animations we started last week. We had to get Blobby over an obstacle and deal with the anticipation, the jump itself and the recovery afterwards. Above is my test animation and Meg told me which bits need extra work. I'll be adding some frames into the couple of little jumps that Blobby does before the vault over the wall. I also need to add some as he is jumping to hang him in the air a bit more and I also need to adjust some of the drawings so that he is more stretched. Love this stuff :)
Yet another idea (and I like this one!)...
After having some chats this morning with Chelsea, Mailin and Kavya I think I have another, more viable idea than the ones I've previously come up with. Here goes...
We have our main character who has always wanted to be a clown, but failed as he is just not funny. In desperation, he looks for kitchen work and the only job he can get is in the kitchen of the 'Circus, Circus' casino in Las Vegas which rubs his face in it even more. He becomes more and more miserable. His co-workers tease him because of his desire to be a clown and taunt him for just not being funny. It has got to the point where he is so unhappy he is driven a bit crazy and cracks, killing his co-workers one-by-one. He creates a signature mark of painting clown smiles on his victims with their own blood. Bit gruesome, but the most exciting idea I think I've come across yet! Any thoughts?
We have our main character who has always wanted to be a clown, but failed as he is just not funny. In desperation, he looks for kitchen work and the only job he can get is in the kitchen of the 'Circus, Circus' casino in Las Vegas which rubs his face in it even more. He becomes more and more miserable. His co-workers tease him because of his desire to be a clown and taunt him for just not being funny. It has got to the point where he is so unhappy he is driven a bit crazy and cracks, killing his co-workers one-by-one. He creates a signature mark of painting clown smiles on his victims with their own blood. Bit gruesome, but the most exciting idea I think I've come across yet! Any thoughts?
Thursday, 15 January 2015
Storytelling ideas - help!
Feel like I'm struggling a bit with coming up with a decent idea, so any comments/thoughts welcome please! I have Clown, Paintbrush and Kitchen.
- Girl is at her birthday party at home. She has a clown as an entertainer but she is scared of him. She goes to hide in the kitchen in a cupboard (Jurassic Park stylee) but can see that the clown is coming after her. Just as the clown reaches the cupboard, he is distracted by the girl's mother. The girl's eyes widen as she is worried what will happen, but then the mum kisses the clown (just a peck, not a full-on snog!) and starts chatting normally with the clown while she prepares the party food. The mum coaxes the little girl out of the cupboard and the clown rubs his make-up off to reveal that he is just the girl's father. The girl is relieved and the mum reapplies the clown make-up and paints the girl's face to match her dad's. They then rejoin the party together and live happily ever after...
- A little boy starts work in a kitchen (maybe working with his father?). He is only tiny, so his clothing etc are all a bit too big for him, therefore he trips over a lot and is quite clumsy. He goes to help the pastry chef make jam tarts. He opens the bag of flour and the flour puffs up in his face and makes his face white. He then sneakily tastes some of the jam (by dipping it into the jar with a pastry brush) when no-one is watching but it gets smeared all over his mouth. The pastry chef returns and can see that the little boy resembles a clown, so gets some of the bubbles from the washing up bowl and gives him clown hair. This could also work with a child in a home kitchen helping their mum or dad bake jam tarts or something.
Let me know your thoughts. I've put up a few ideas on previous blog posts too. I've had ideas of chefs who want to be clowns and clowns who want to work in a kitchen, but these all seem a bit too obvious. Think the part I'm struggling with most is incorporating the paintbrush! Aaarggh!
These are the words I came up with right at the beginning when we got the brief:-
CLOWN: red nose, wig, funny/scary, custard pies, painted face (paintbrush!!), sad/happy, tricks - juggling, unicycle, falling over, big feet, colourful, circus, comedy
PAINTBRUSH: colours, held in fingers/feet/mouth, art, pastry brush, artists brush, painter & decorator
KITCHEN: cottage/traditional/cluttered/homely or clean/modern/white/shiny, commercial kitchen, home kitchen, cooking show, TV chef, heart of the home, tiles, stainless steel, washing up, washing, dishwasher, oven, toaster, fridge, market kitchen, mobile (burger van type) kitchen
Wednesday, 14 January 2015
Life drawing 14/01/15
We had another new life model today - Sharon. Really enjoyed drawing a larger female figure and found it a bit easier than the male drawings we've done before.

These were all 10 minute turnaround poses in charcoal

This was a 20 minute pose, completed in chalk pastels and charcoal
Monday, 12 January 2015
Film Review - La Jetee (1962)

Fig.1 La Jetee (movie poster, 1962)
Directed by Chris Marker, La Jetee is a film made almost entirely of stills and is set in post-apocalyptic France. We are introduced to the film when a young boy notices a woman standing at the end of a pier. He runs to her but just as he is about the reach her, he sees a man fall to his death. World War III breaks out and the next time we meet the character, he is a prisoner being used for time travel experiments due to his strong memories of the past. John Parrot of The Film Review notes "Marker says that La Jetee was made like a piece of automatic writing, the technique favoured by the surrealists and dadaists." (Parrot, 2011). The film is said to have been the inspiration for the 1995 film Twelve Monkeys, directed by Terry Gilliam.

Fig.2. The lady on the pier, (movie still, 1962)
The fact that the film is narrated over stills gives it a slightly eerier and more poignant feel, drawing us into the story even further. We begin to feel sad for the main character when he revisits memories of his time with the lady he first noticed on the pier (fig.2). A relationship builds up between them and just at the pivotal moment, the experiments are ended and the man is sent forwards to the future, his only wish to be back with her. Brian Dillon sums up the film nicely in his review for The Guardian; "La Jetee is a complex and poetic reflection on the destructive and redemptive powers of memory." (Dillon, 2009).

Fig.3. Experiments on our main character, (movie still, 1962)
The film climaxes when the main character revisits the pier he remembers from when he was a child. He can see the woman he loves at the end and runs to her. As he is running he sees a small child who he recognises to be the younger version of himself. The realisation then hits that as a child, the man he witnessed collapse and die was in fact, himself (Fig.3). We are never fully told who the woman in the story is and she could just as equally be the boy's mother, as she could a love interest. The fact that her face is such a strong memory could point to the former. The woman's face as a close-up also gives the film the only piece of moving image, amongst the collection of stills.

Fig.4. The man races towards to woman on the pier, (movie still, 1962)
Samuel Walters writes for DauntlessMedia.net "La Jetee is a fantastic film - provided that you're willing to undergo a thoroughly unique and unexpected experience." (Walters, s.d.). Although at first the arrangements of stills seems challenging to sit through, the calm nature of the narrator's voice and the close-up shots of the characters really enable us to feel a part of the film and experience some feeling of empathy with the man in the story. What may seem like a hindrance not to have moving pictures, becomes quite refreshing towards the end and a welcome treat for the senses. At only 28 minutes long, La Jetee is not a film that should be missed and will stay in your memory forever.
Illustration List:
Figure 1 - La Jetee (1962) [Movie Poster] At:
(Accessed 07.01.15)
Figure 2 - The lady on the pier (1962) [Movie Still] At:
(Accessed 07.01.15)
Figure 3 - Experiments on our main character (1962) [Movie Still] At:
(Accessed 07.01.15)
Figure 4 - Racing towards the woman on the pier (1962) [Movie Still] At:
(Accessed 07.01.15)
Bibliography:
Dillon, B (28th March 2009), The Guardian article, At:
(Accessed on 07.01.15)
Parrot, J (28th August 2011), The Film Review, At:
(Accessed on 07.01.15)
Walters, S (s.d.) DauntlessMedia.net review, At:
(Accessed on 07.01.15)
Maya tutorials - PreViz Pan Shot
We started looking at camera shots in today's Maya lesson. This was lots of fun and quite simple to do really. We went through the steps with Simon, rather than following the tutorial but it was really easy.
Maya tutorials - MEL Robot animation
I completed most of this in the lesson last Monday but just had to make the robot move forwards! All finished now. Much fun.
Sunday, 11 January 2015
From Script to Screen - further ideas and initial sketches
I've decided to develop further an idea I had for my three choices from the mysterious blue box, which were Clown, Kitchen & Paintbrush.
The story revolves around two main characters, a 'Clown' and a 'Ballerina' (?). The two characters are best friends, have known each other all their lives and are around 3 years old. :)
They are at nursery together playing in the toy kitchen in fancy dress (obviously as a clown and a ballerina). A little scrap breaks out and they fight in typical toddler fashion; pushing & pinching etc. Ballerina then pulls off Clown's colourful afro wig and hits him with it, which is the last straw for Clowny! Clown rips off Ballerina's tutu and storms off to the art area. While painting (with the paintbrush), he notices Ballerina distraught in the background, her tutu in tatters. He feels bad and so paints a pictures of her. (and maybe gives her his Clown neck-ruffle to use as a tutu?)
I wish my object was a tutu as this story would work so much better!! Think I definitely need to incorporate the paintbrush in some more so will keep my thinking cap on. Meanwhile, here are some initial quick sketches I did during my thinking time! Enjoy and please leave feedback! :)


Saturday, 10 January 2015
Storytelling ideas
Very excited to be given our new project on Tuesday. From the mysterious blue box, I pulled out:
Clown
Paintbrush
Kitchen
I've had a few ideas so far. Please feel free to leave feedback...
Initial quick ideas:-
1. Part-time clown, part-time painter & decorator. At the circus performing and upsets an audience member by doing regular clowny things. Clown finishes for the day at the circus for the night and in the morning goes off to his painting & decorating job. Realises that the man who has asked him to redecorate his kitchen is the same one he upset last night at the circus performance.
2. The 'frustrated clown'. A chef (who looks a bit like a clown) is fed up with his current job and gives it up to join the circus. Not sure where the paintbrush fits into this one yet.
3. Skint and failing clown has to work in a kitchen to get food but he is unsure how as he only knows circus tricks. Washes up with a paintbrush etc, etc.
4. Clown grandma at home baking in the kitchen. She has gone a bit loopy and is using a paintbrush to try and do everything. Pics of her circus days in the background and she is reminiscing about her past.
5. Scary serial killer clown hides his victims' bodies in the kitchen and he paints over them to try and disguise them as household items (piles of ironing, dishwasher, vegetable rack etc.
6. Clown with a magic paintbrush.
7. (this is the idea I think I might look into further). A clown and a ballerina/nurse/doctor/fireman/whatever are in the kitchen. Clown is cooking dinner and the (whoever else) is making a cup of tea. They start to argue over something and things get heated, but then they start acting strangely. Clown stick a paintbrush in the other character's nose and they push the clown over. Clown then starts crying. We zoom right in on the clown's face (nose?) or paintbrush and then zoom out to reveal that they are two small children playing with a toy kitchen in their dressing up outfits.
Please share your thoughts. Don't think we have the next blockbuster here but am coming up with ideas all the time so will keep on posting as and when they come!
Friday, 9 January 2015
Wednesday, 7 January 2015
Character Design
Much to everyone's excitement, we started our Character Design lessons today with Justin. He explained different character styles to us, ranging from 'iconic' to 'realistic' and asked us to transform one of our favourite characters into a completely different style.
I chose the infamous Boba Fett and re-drew him in an iconic style. It was lots of fun and made us concentrate on the more memorable parts of the character; those that make them instantly recognisable, despite the style. Here is Iconic Boba Fett! :)


I chose the infamous Boba Fett and re-drew him in an iconic style. It was lots of fun and made us concentrate on the more memorable parts of the character; those that make them instantly recognisable, despite the style. Here is Iconic Boba Fett! :)
This one didn't take me an awful lot of time, so I managed to squeeze in an Iconic Wicket too...
Justin then explained how we can gauge a certain character from their shape. We were given an existing character at random and had to decide which shape(s) they were already and then change or exaggerate it to give them a different character. I was given Buttercup, one of the Powerpuff girls. She is mainly a circle, but with a few very subtle triangles, suggesting she is mainly friendly but with maybe an angry streak. I exaggerated these triangles and gave her a slightly different pose to try and make her seem more fierce and deadly!
Life Drawing is back!!
Very excited to be back to life drawing again and with a new model this time!

First set - 10 minutes poses (with a 9B graphite pencil)

Quick 1 min, 3 min or 5 min charcoal sketches

30 min pose with graphite pencil, charcoal, coloured pencil and Sharpie pen! :)
Monday, 5 January 2015
Maya tutorial - Using motion paths
Another little animation making the rocket follow a motion path. Love it! :)
Maya tutorial: Car Animation Rig
In Simon's lesson today we tried out some basic animation using the car model in the tutorial. Much fun!
Sunday, 4 January 2015
Maya Tutorials - Depth of Field

Photoshop version

After Effects version
Now to see to the crying baby...
Maya Tutorials: Render Layers
Enjoying doing these render layers, but would like to practise more. I followed the tutorial easily but feel like I want to have another go at it to really pay attention to what the changes were. At the moment with a lot of the Maya tutorials, I'm concentrating more on HOW to do things and not always WHY we do them. Something to work on next term. :)


Maya, then Photoshop - with Beauty Pass on
Maya, then Photoshop - no Beauty Pass
Maya, then After Effects
Thursday, 1 January 2015
Maya Tutorials - Old Alley Complete!
Feel very naughty that I'm only just finishing these, but I wanted to complete each stage before putting it up on the blog and I've had to complete most of them in short sittings. It feels like it's taken forever but I've really enjoyed creating the Old Alley scene. Had a few problems with Maya crashing along the way (when it came to the later tasks of bump and dirt mapping) and for some reason I couldn't render using mental ray. Not sure why so I'll check this out with Simon or Alan.

UV Layouts

Colour Mapping

Bump & Specular Mapping

Dirt Mapping and Final Render!
Subscribe to:
Posts (Atom)